
DOCUMENTATION
Getting Started
Getting Started on CRM24
Access your environment by opening your web browser and browse to the URL provided to you by Braintree, which will look something like this:

Enter the admin user name and password:
Navigation
The BT CRM24 Combo Business App opens in the following page:
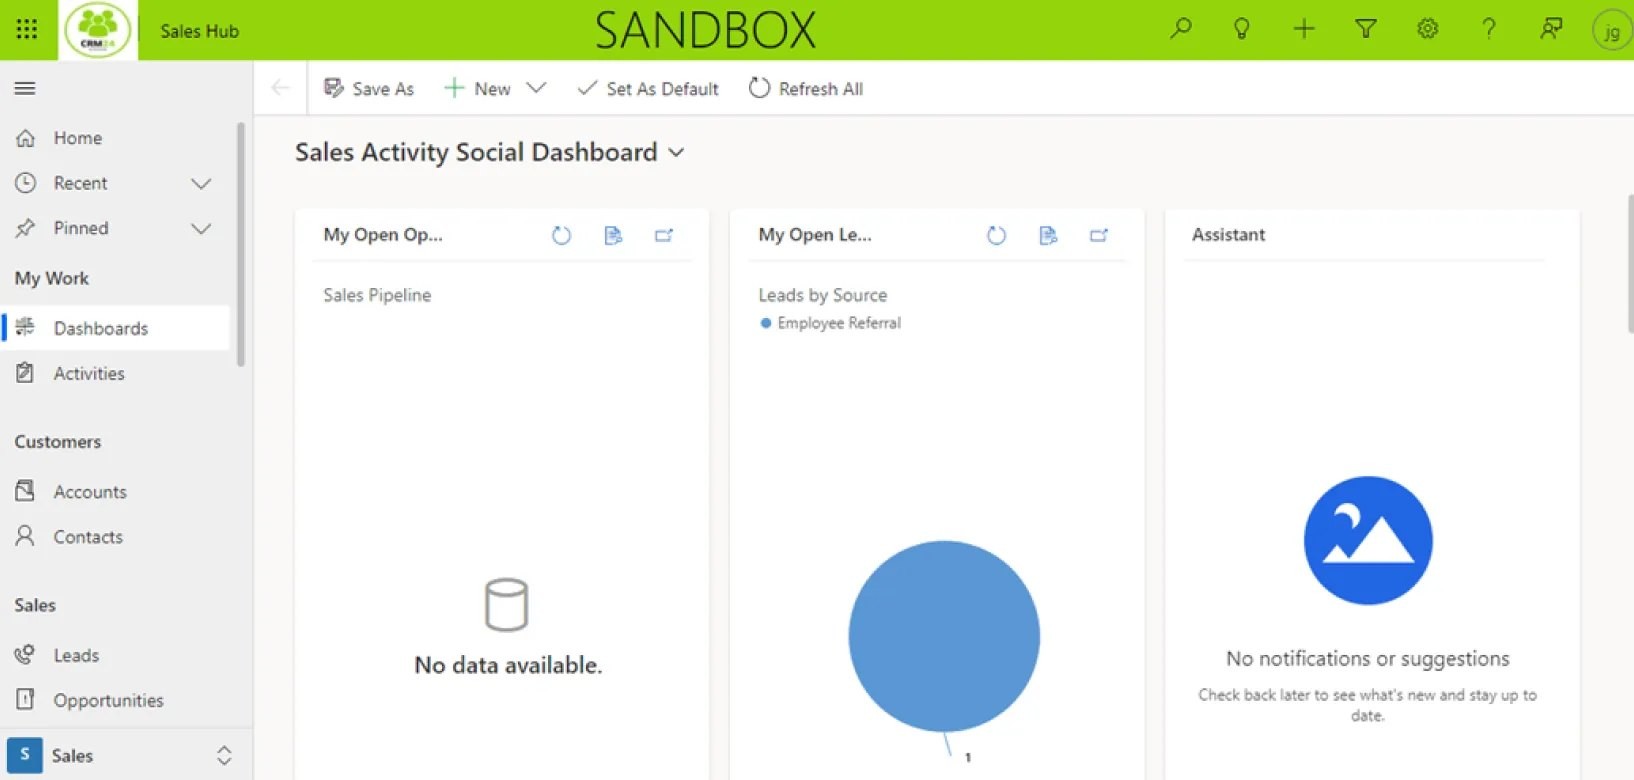
Navigation within the app is located on the left side of the page. This is known as the site map. There are different areas, such as;
dashboards
activities
other entities
tables
accounts
contacts
leads
opportunity
Jump to:
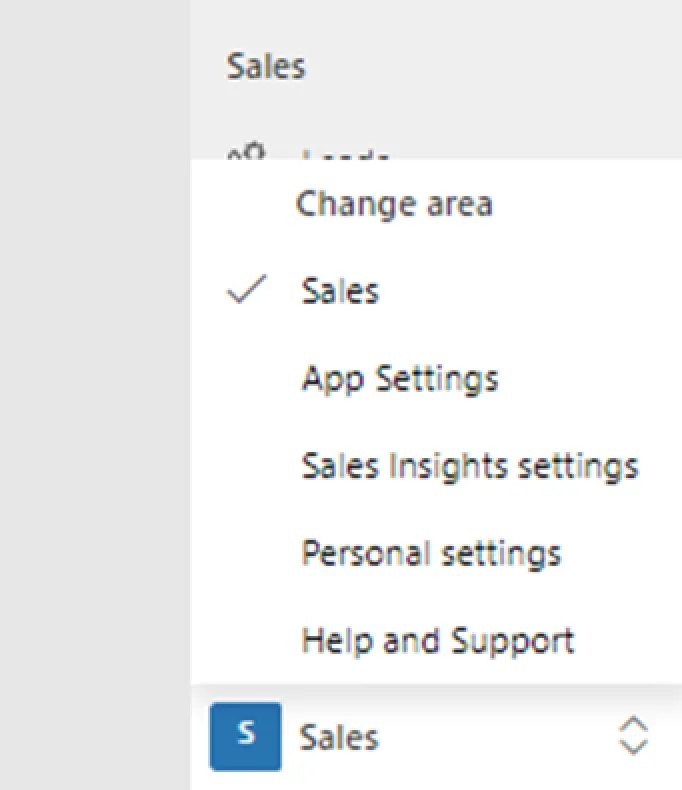
At the bottom left, you can change the area within the app.
Navigation Pane
At the bottom left, you can change the area within the app.

To switch between the Sales Hub or the Service Hub, simply click on the existing hub e.g. Sales Hub, found on the top of the page next to the CRM24 icon.

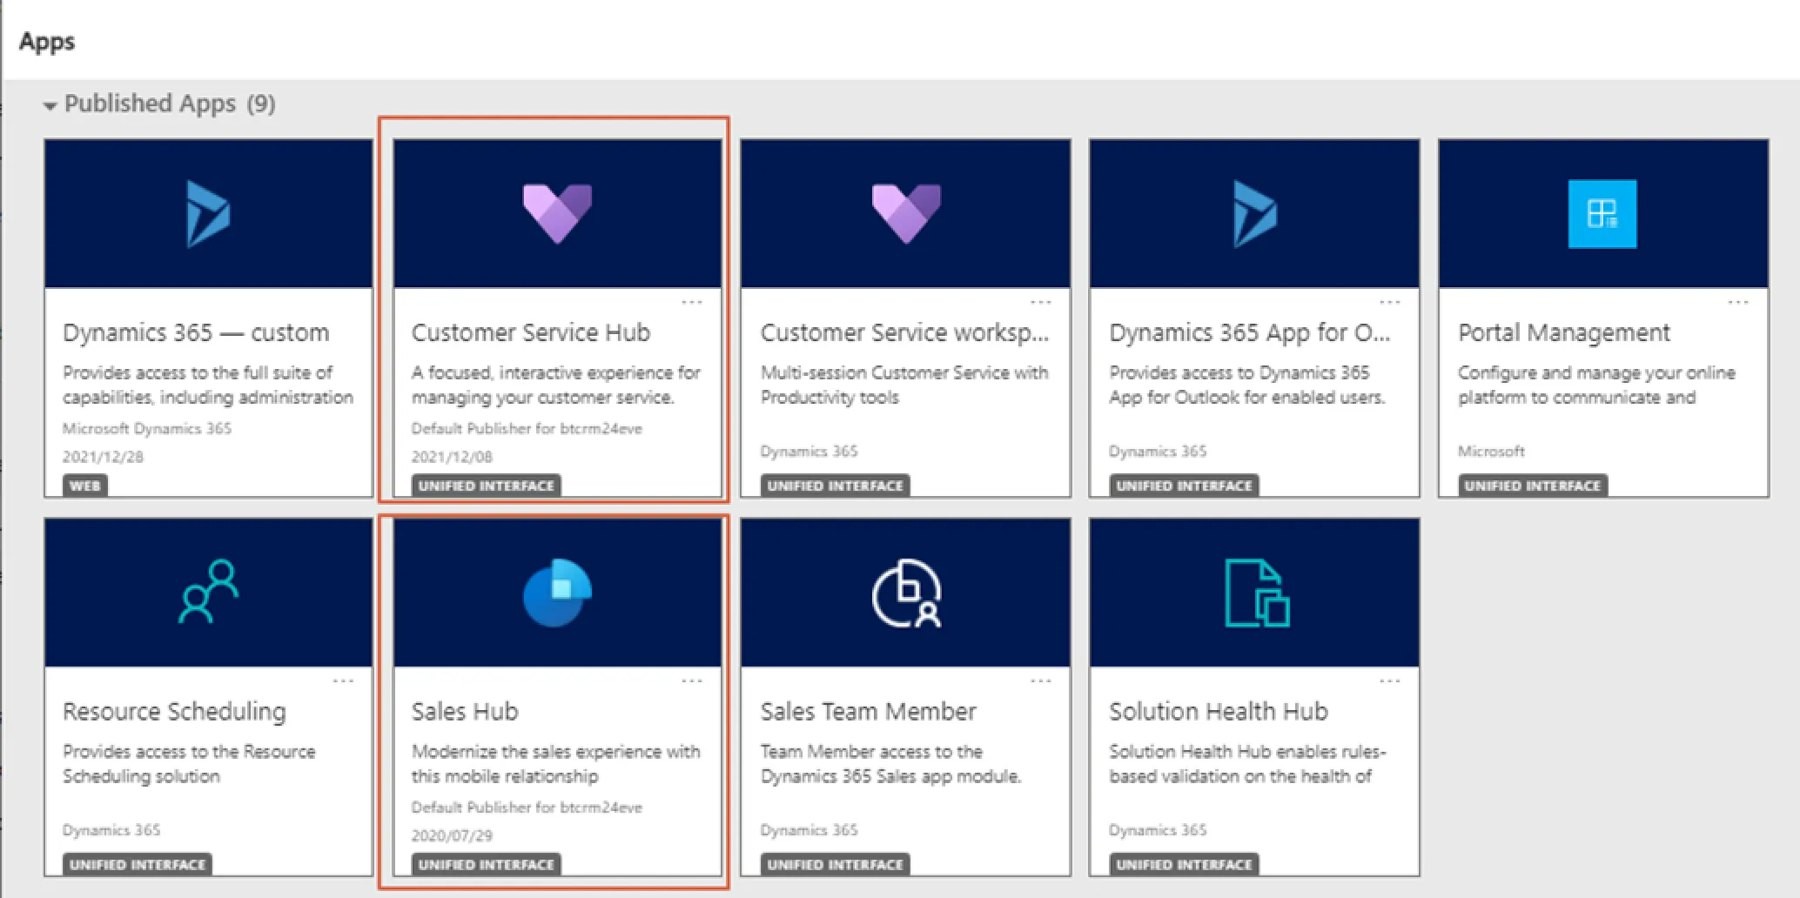
As part of CRM24, the 2 apps that are available for use are;
After selecting Service Hub, the navigation pane on the left will have a few different options, now relevant to the Service Hub.

For easy navigation, you can use the “Recent” area to navigate to areas recently visited.

To pin items from recently viewed record types to see them under “Pinned” area.

Dashboards
For both the Sales and Service areas there are a number of default dashboards that can be viewed.

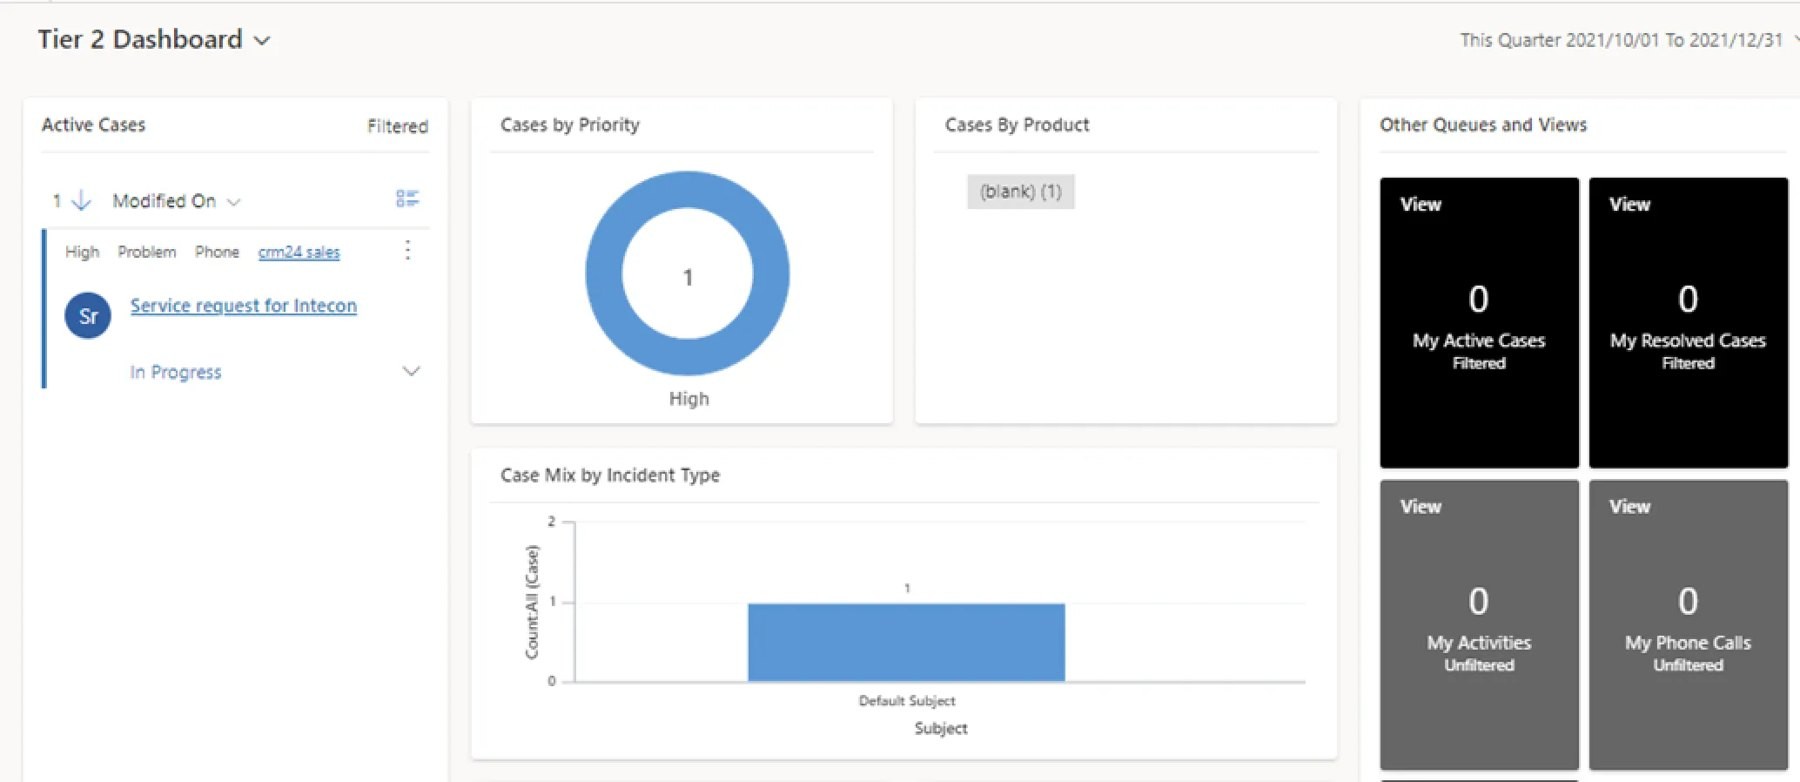
Each of these dashboards is customised to show relevant data e.g. Tier 2 Dashboard.
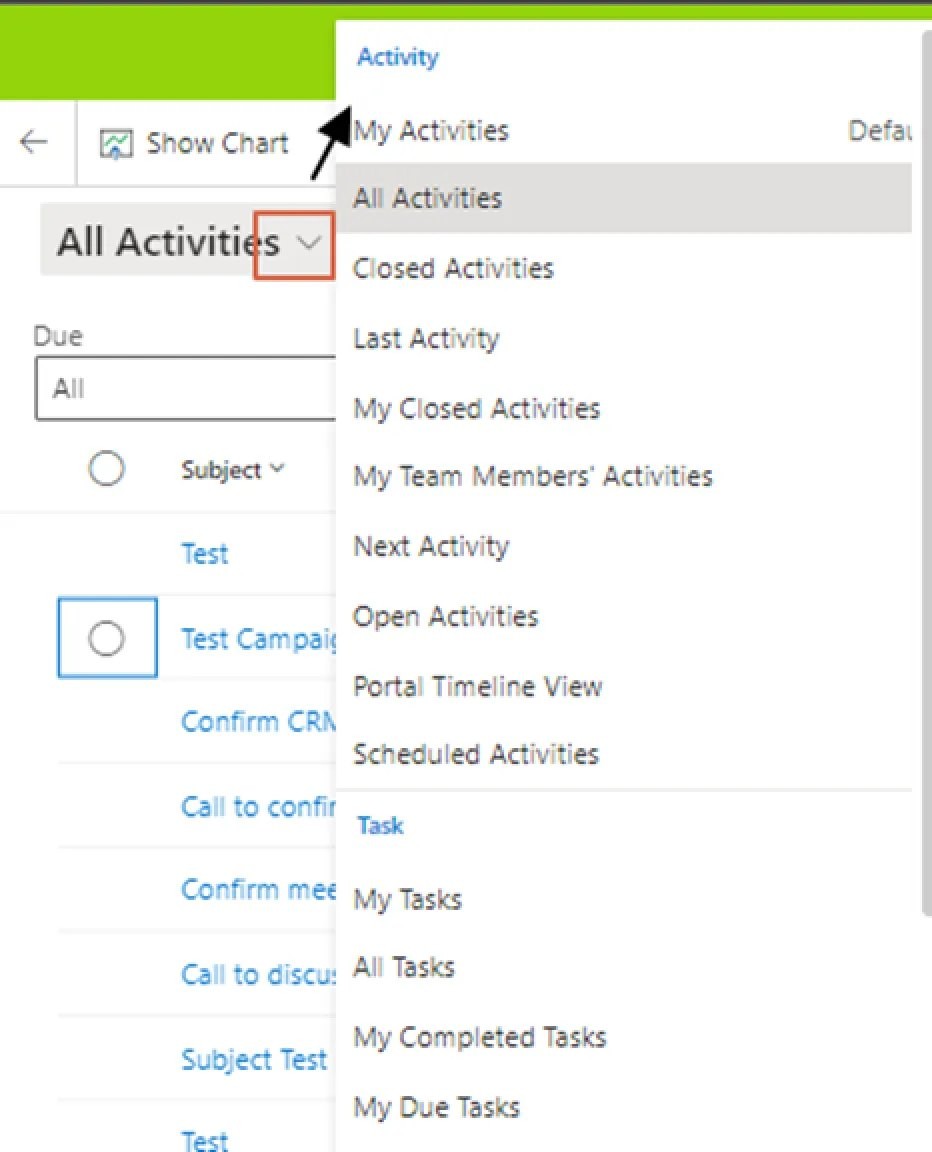
For the specific list you can use the dropdown next to the view name and choose the appropriate option:
Use the command bar buttons at the top to create new records.
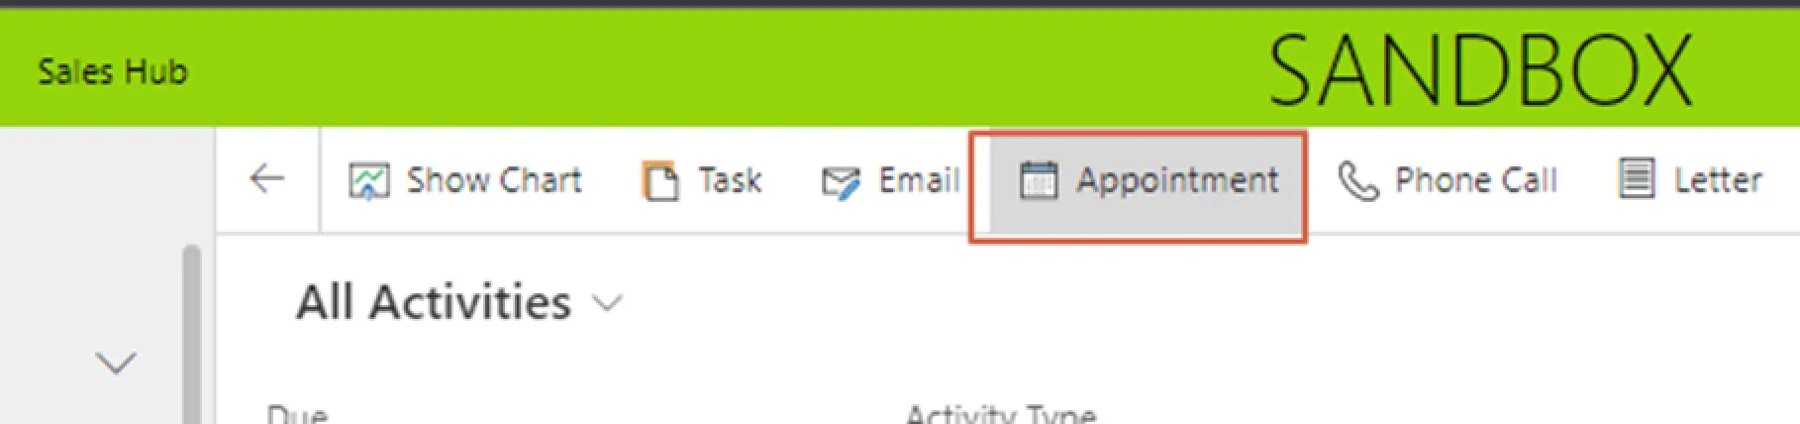

The details of the new record can then be completed and saved e.g. new appointment.


When a list of records is displayed from a view, click on the name of the record to open that record.
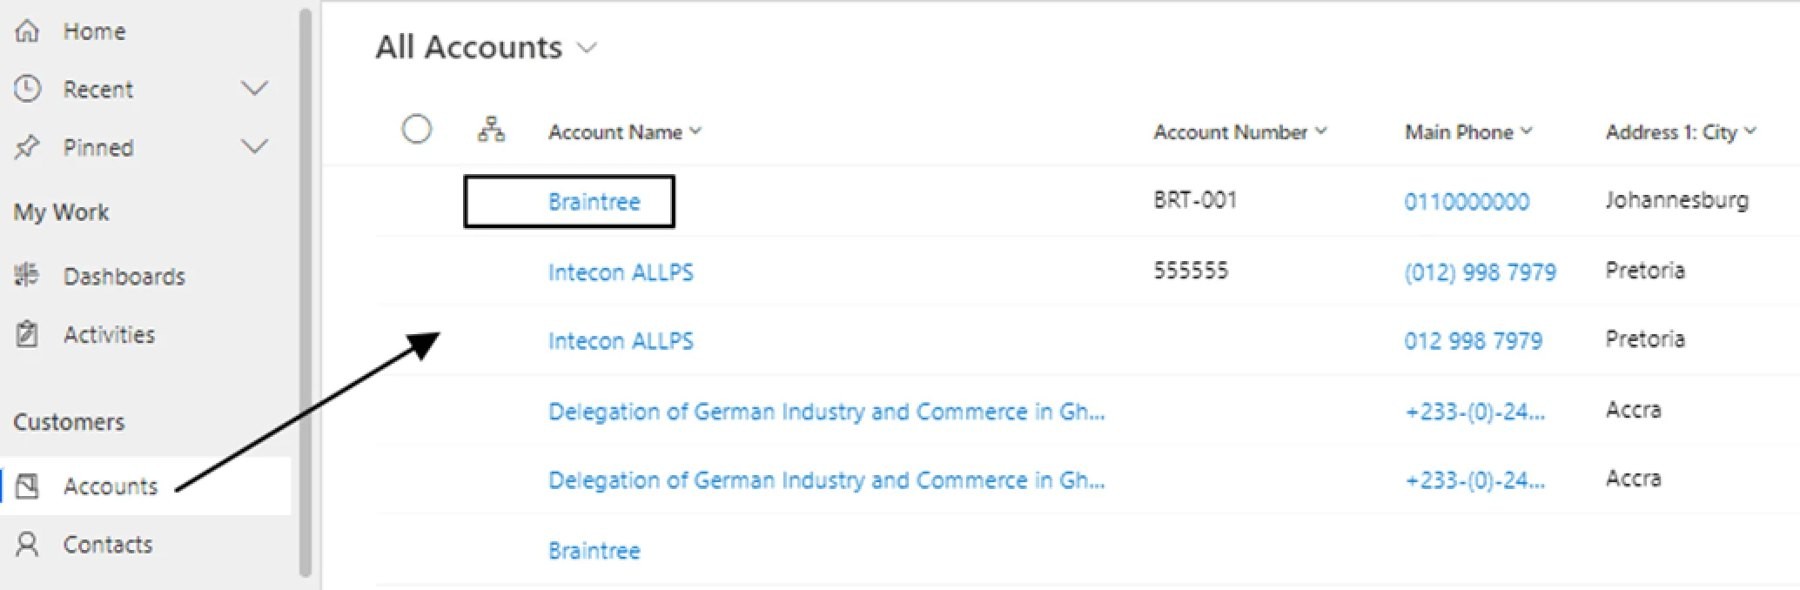
The record is then opened for viewing or editing.

Filtering and Searching
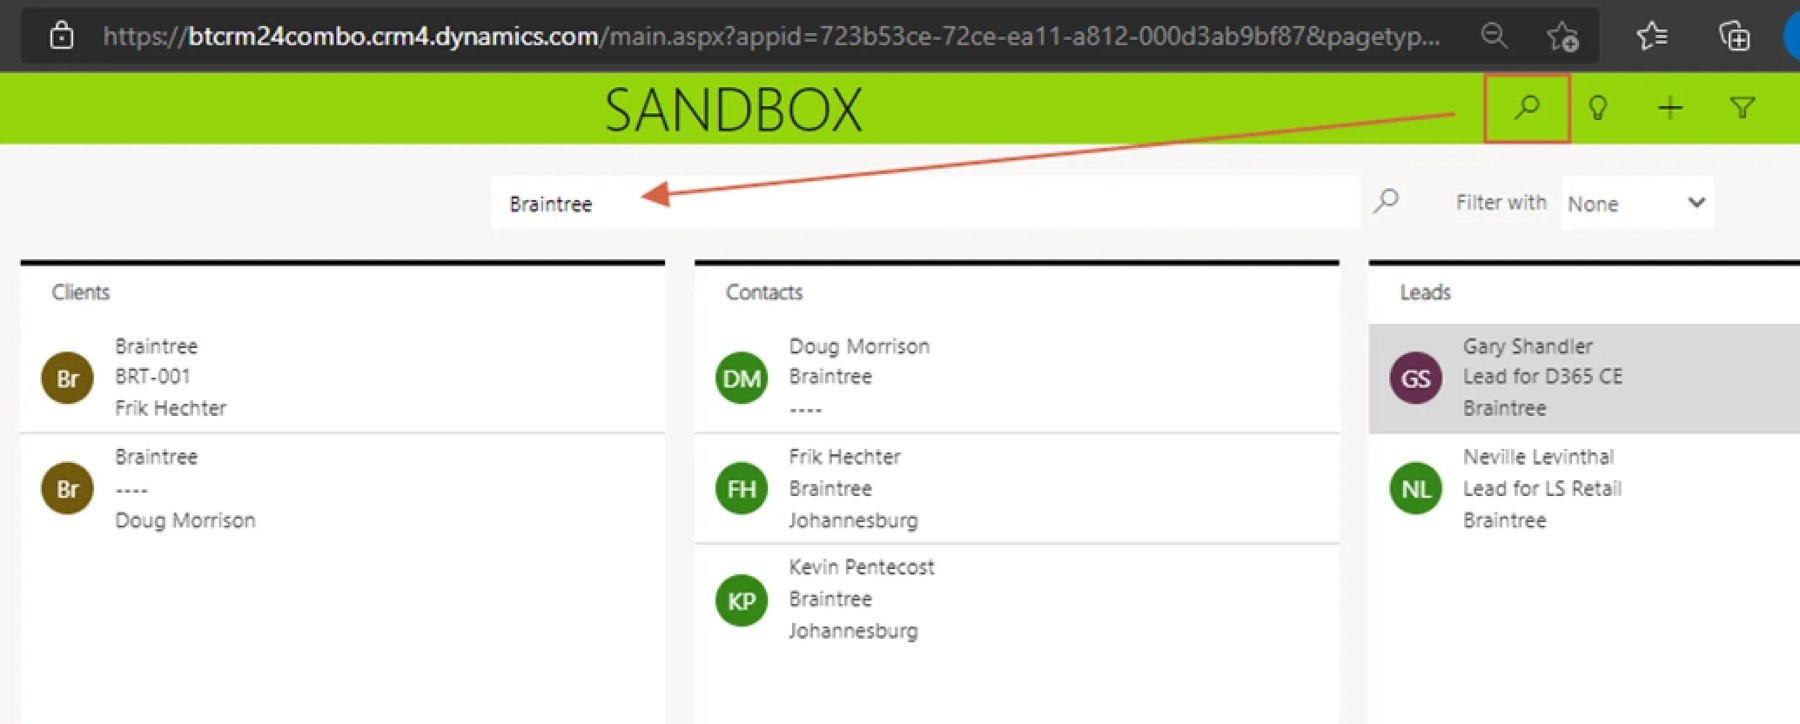
Global Search: The global search is very useful to search across various entities i.e. Clients, Contacts, Leads etc.
Each of these dashboards is customised to show relevant data e.g. Tier 2 Dashboard.
Advanced Find: Allows you to build personal views. You could start with a default view and then save it with a new name, and thereafter edit the columns and properties and filters used.


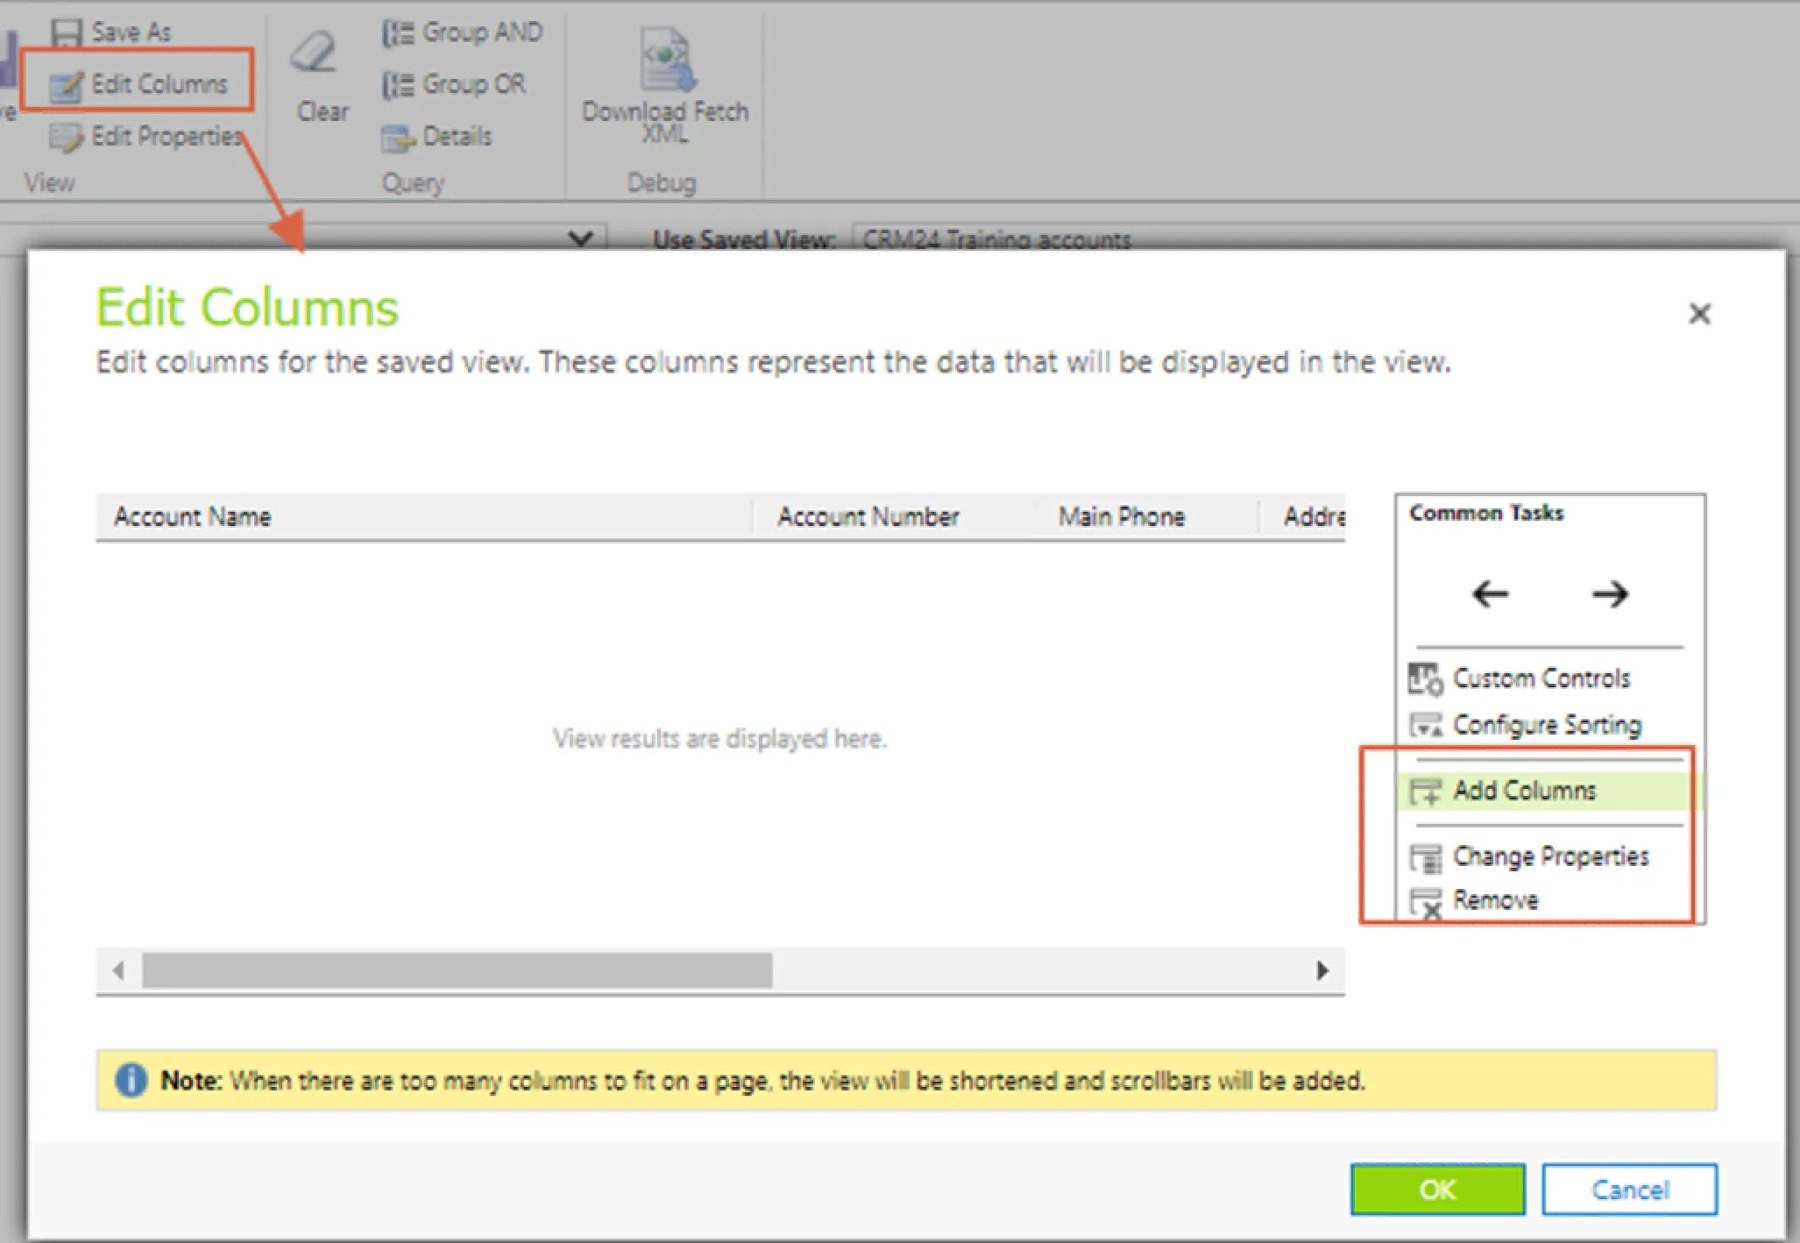
These Personal Views can be used for ad hoc reporting, for instance to export some lists to Excel.
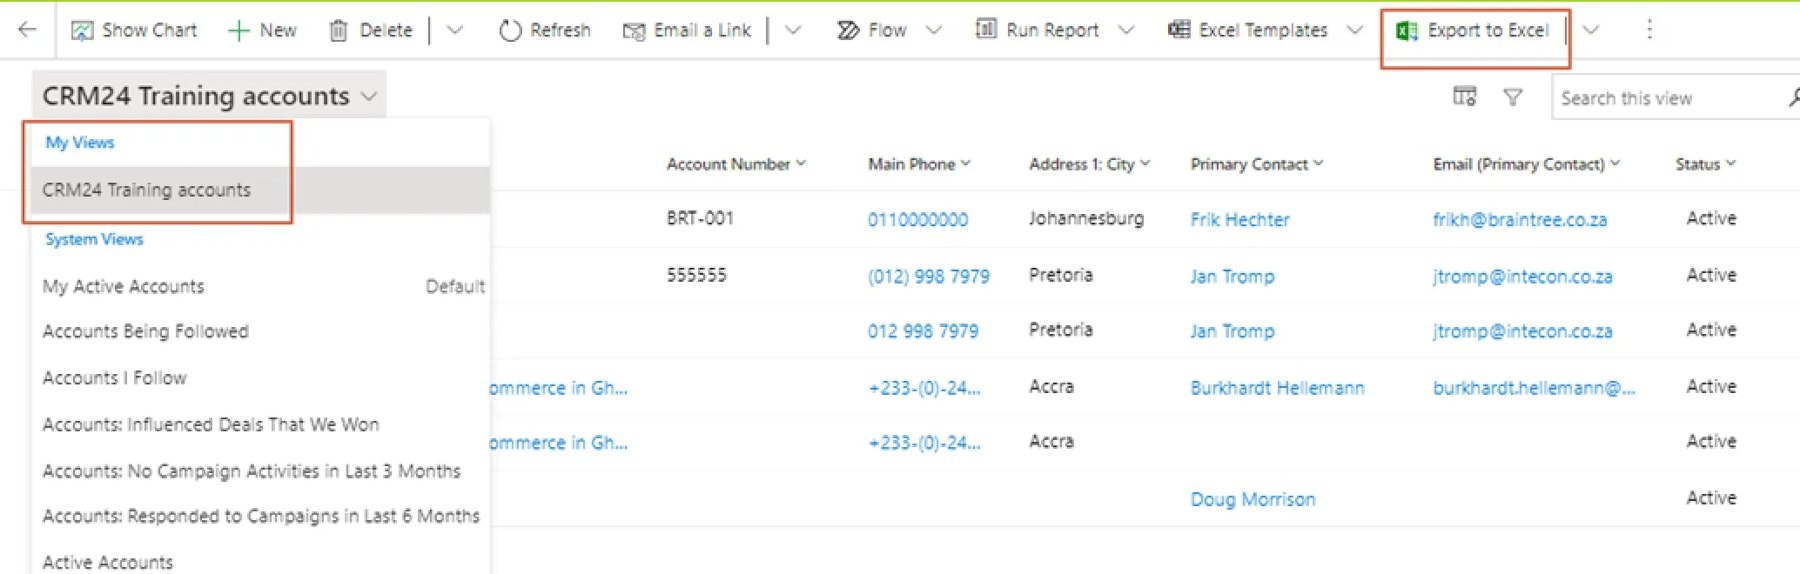
The Advanced Filter can be used to restrict the list based on certain applied column filters. After clicking on the Advanced Filter:

Various fields can then be used to apply filters to the list.
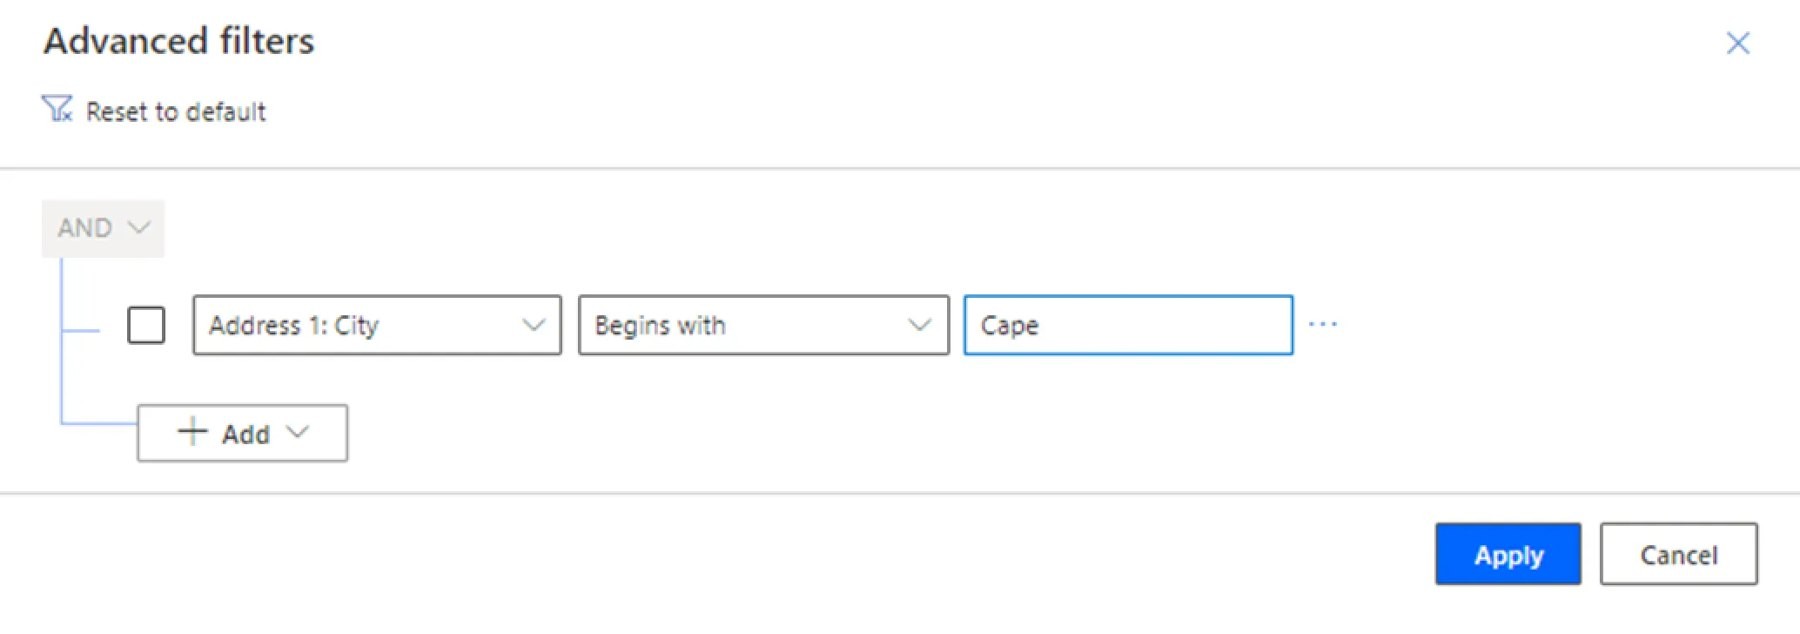
Another way of applying a column filter is to click on the column and choose to “Filter By”.

Personalisations
Using the Gear in the top right of the window, you can access Personalisation Settings.

This is where you can modify certain settings that relate to your login only, for example Number of records to display on a page (useful when needing to export records to Excel), or an email signature.

Theme Colours and Logos
The system theme colours of CRM24 can be changed to match your organisations theme colours. You can also add a logo. This is done from within Settings Customisation.

Then choosing Themes.


New themes can be created by clicking on New.
Existing themes can be cloned by clicking on Clone. Once a theme has been created or edited, to make it the active theme, click on Publish Theme.
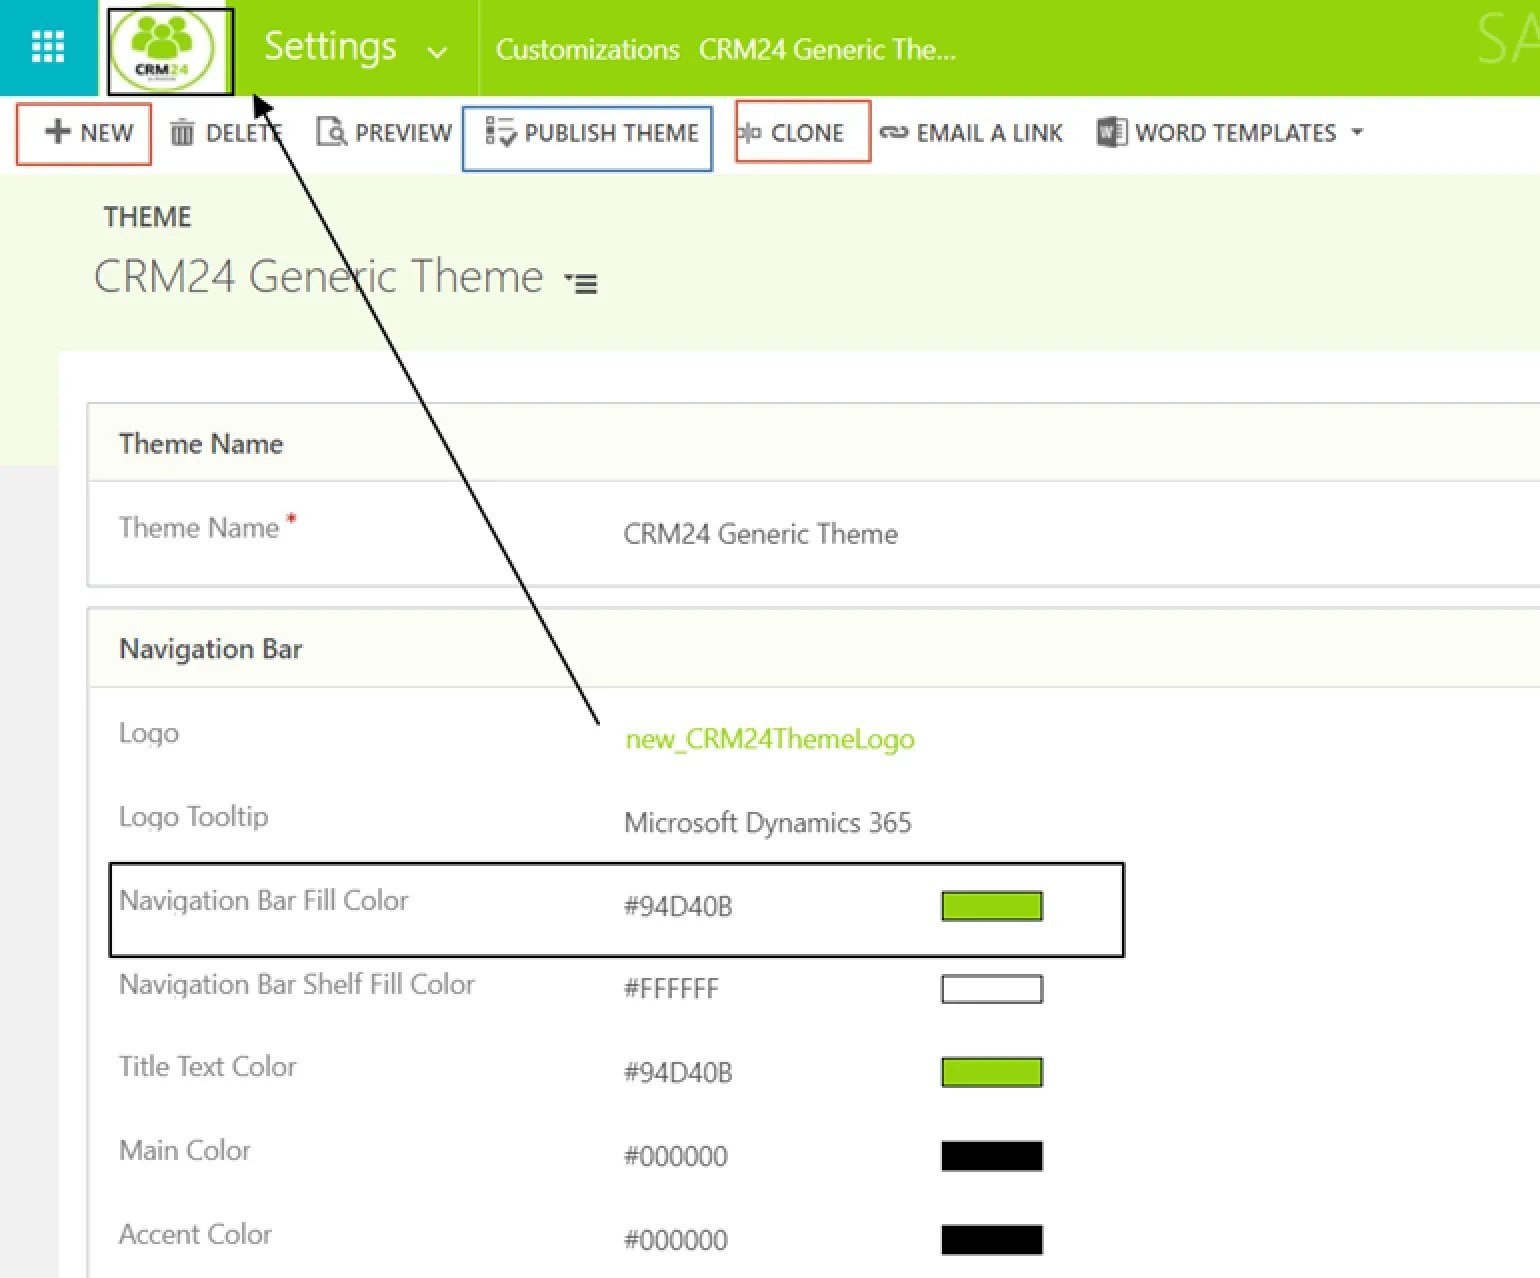

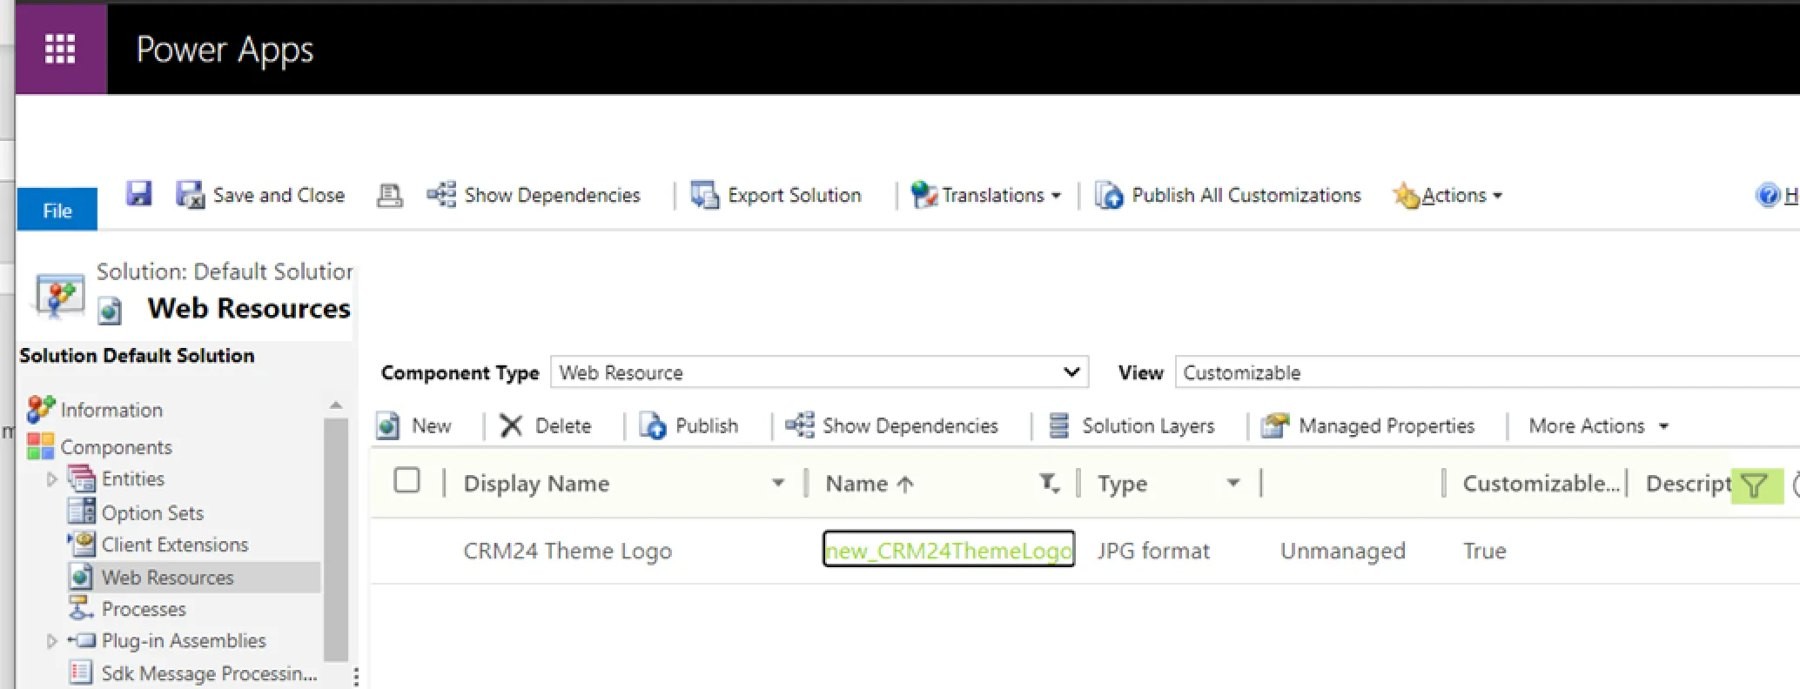
Navigate to Components Web Resources.

Need help with your environment?
Use your agreed Braintree support channel, or contact the team to confirm the right support route.
Contact Braintree
