
DOCUMENTATION
Take on opening balances
Overview
This section deals with the process of loading opening values into the general ledger and the various subledgers with the system. Before starting the process you should already have:
Completed configurations for all modules that you will be using
Loaded and validated all master data
Decided on a financial cutover date, typically at the end of a month, or the end of a financial year.
From the Home page, click on ‘Opening Balances’:
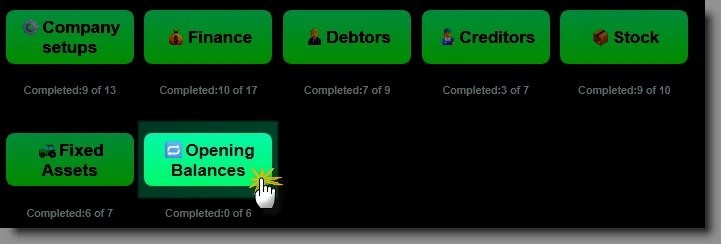
The take-on task list will open. Before you begin, capture the take-on date. This should be the last day of the cut-over month.
Suspense accounts for subledger take-on
During installation, some general ledger accounts are created to be used during the take-on of sub ledgers.
General Ledger Opening Balances
General ledger balances should be taken on as at the chosen opening balance date. A balance must be provided for each unique combination of general ledger account number and dimension values. From the Opening Balances Configuration page, click on ‘▶️Run Setup’ for the task ‘Take on GL opening balances’: The TAKEON batch will open. A default batch has been created during installation. You may choose to create more batches if required.

The process is as follows:
Create Take-on Excel Sheet, to create a template
Populate the template
Import the batch
Review errors
Edit journal and post.
Create Take-on sheet
Click on ‘Create Take-on Excel Sheet’. From the dialog, select ‘General Ledger’:

When the sheet has downloaded, open it and load your data as follows:
Account No. , The General Ledger account number
Posting Date , The take-on date
Document Type , Can be left blank for GL
Document No. , Use a generic document number, such as ‘TAKE-ON’
Description , Use a generic description
Amount , The opening balance for the account
Currency Code , not applicable
Amount (LCY) , not applicable
External Document No. , not applicable
Document Date , not applicable
Due Date , not applicable
If you are using dimensions, a column for each dimension will appear at the end of the template. Things to keep in mind:
The batch must balance: the total must equal zero
If you are using dimensions: there should be one line per combination of GL account number, and the various dimension values.
Import Data Sheet
After you have finished preparing the spreadsheet, save and close the sheet. On the batch list page, click ‘Import Batch’. From the dialog, click on ‘Import Data’, then click OK:

Navigate to the folder where your take-on sheet was saved, and select it. When the import has completed, you will see the dialog:
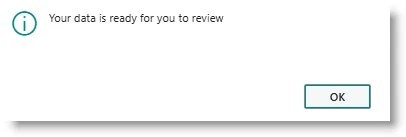
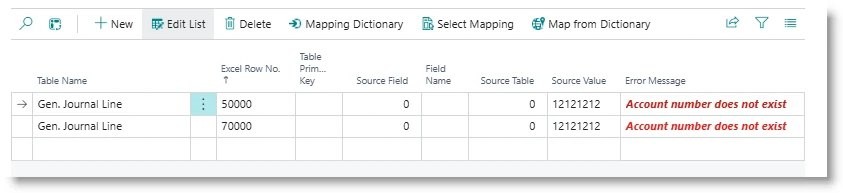
Click OK to complete the process. If errors occurred during the import, they will be recorded in the error log. This will typically include records with invalid account numbers or dimension codes. Click on ‘Review Errors’ to display the errors:
Click on ‘Edit Journal’ to open the transactions. You can check or edit the entries. If you are happy with the batch (and it balances to zero), you can post the batch.
Debtors Open Items
The debtors book can be brought on as opening balances per customer, or open entries (transactions with an outstanding balance). From the Opening Balances Configuration page, click on ‘▶️Run Setup’ for the task ‘Take on Debtors open items’: The TAKEON batch will open. A default batch has been created during installation. You may choose to create more batches if required.
The process is as follows:
Create Take-on Excel Sheet, to create a template
Populate the template
Import the batch
Review errors
Edit journal and post.
Click on ‘Create Take-on Excel Sheet’. From the dialog, select ‘Debtors’:

When the sheet has downloaded, open it and load your data as follows:
Account No. , The Customer account number
Posting Date , The take-on date
Document Type , Enter Invoice, Credit Memo, Payment or Refund
Document No. , Enter the document number, for example invoice number
Description , Optional
Amount , The value of the transaction, in its source currency
Currency Code , If the transaction is in a foreign currency, enter the currency code.
Amount (LCY) , The value of the transaction in home currency
External Document No. , The customer’s document number if applicable
Document Date , If the document date and posting are different, enter it here
Due Date , For invoices, the date on which payment is due.
If you are using dimensions, a column for each dimension will appear at the end of the template. Enter one line per outstanding transaction.
After you have finished preparing the spreadsheet, save and close the sheet. On the batch list page, click ‘Import Batch’. From the dialog, click on ‘Import Data’, then click OK:
Navigate to the folder where your take-on sheet was saved, and select it. When the import has completed, you will see the dialog:
Click OK to complete the process. If errors occurred during the import, they will be recorded in the error log. This will typically include records with invalid account numbers or dimension codes. Click on ‘Review Errors’ to display the errors:
Click on ‘Edit Journal’ to open the transactions. You can check or edit the entries. The import process will insert a balancing account to which the contra entry in the general ledger will be posted. This will be one of the suspense accounts created during installation. If you are happy with the batch, you can post the batch.
Creditors Open Items
The creditors book can be brought on as opening balances per vendor, or open entries (transactions with an outstanding balance). From the Opening Balances Configuration page, click on ‘▶️Run Setup’ for the task ‘Take on Creditors open items’: The TAKEON batch will open. A default batch has been created during installation. You may choose to create more batches if required.
The process is as follows:
Create Take-on Excel Sheet, to create a template
Populate the template
Import the batch
Review errors
Edit journal and post.
Click on ‘Create Take-on Excel Sheet’. From the dialog, select ‘Creditors’:
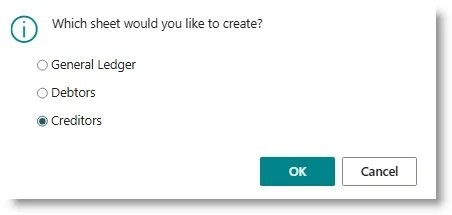
When the sheet has downloaded, open it and load your data as follows:
Account No. , The Vendor account number
Posting Date , The take-on date
Document Type , Enter Invoice, Credit Memo, Payment or Refund
Document No. , Enter the document number, for example invoice number
Description , Optional
Amount , The value of the transaction, in its source currency
Currency Code , If the transaction is in a foreign currency, enter the currency code.
Amount (LCY) , The value of the transaction in home currency
External Document No. , The customer’s document number if applicable
Document Date , If the document date and posting are different, enter it here
Due Date , For invoices, the date on which payment is due.
If you are using dimensions, a column for each dimension will appear at the end of the template. Enter one line per outstanding transaction.
After you have finished preparing the spreadsheet, save and close the sheet. On the batch list page, click ‘Import Batch’. From the dialog, click on ‘Import Data’, then click OK:
Navigate to the folder where your take-on sheet was saved, and select it. When the import has completed, you will see the dialog:
Click OK to complete the process. If errors occurred during the import, they will be recorded in the error log. This will typically include records with invalid account numbers or dimension codes. Click on ‘Review Errors’ to display the errors:
Click on ‘Edit Journal’ to open the transactions. You can check or edit the entries. The import process will insert a balancing account to which the contra entry in the general ledger will be posted. This will be one of the suspense accounts created during installation. If you are happy with the batch, you can post the batch.
Need help with your environment?
Use your agreed Braintree support channel, or contact the team to confirm the right support route.
Contact Braintree
