
DOCUMENTATION
Setup and Configuration
Before using DocuVault, some initial setups and configurations are required.
Azure App Registration
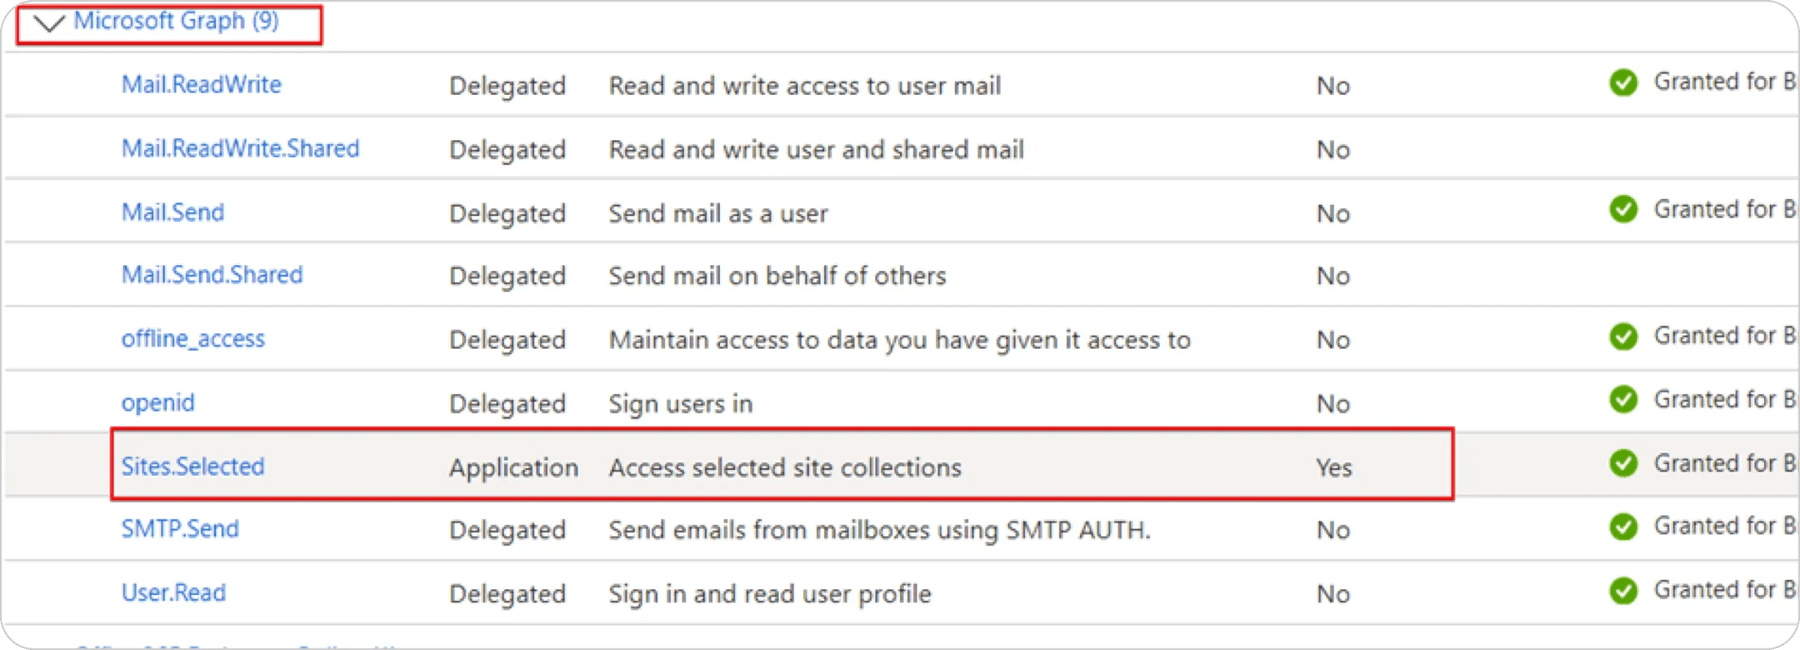
Create an app registration in Azure with the Sites. Selected permission:


Find your SharePoint Site ID, you can follow these steps: 1. Navigate to your SharePoint site: Open your SharePoint site in your web browser. 2. Modify the URL: Add /_api/site/id at the end of your site’s URL. For example, if your site URL is https://companyname.sharepoint.com/sites/sitename, you would modify it to https://companyname.sharepoint.com/sites/sitename/_api/site/id.
3. Press Enter: This will display the site information, including the Site ID, in a JSON format.

SharePoint Access
Find your SharePoint Site ID, you can follow these steps: 1. Navigate to your SharePoint site: Open your SharePoint site in your web browser. 2. Modify the URL: Add /_api/site/id at the end of your site’s URL. For example, if your site URL is https://companyname.sharepoint.com/sites/sitename, you would modify it to https://companyname.sharepoint.com/sites/sitename/_api/site/id.
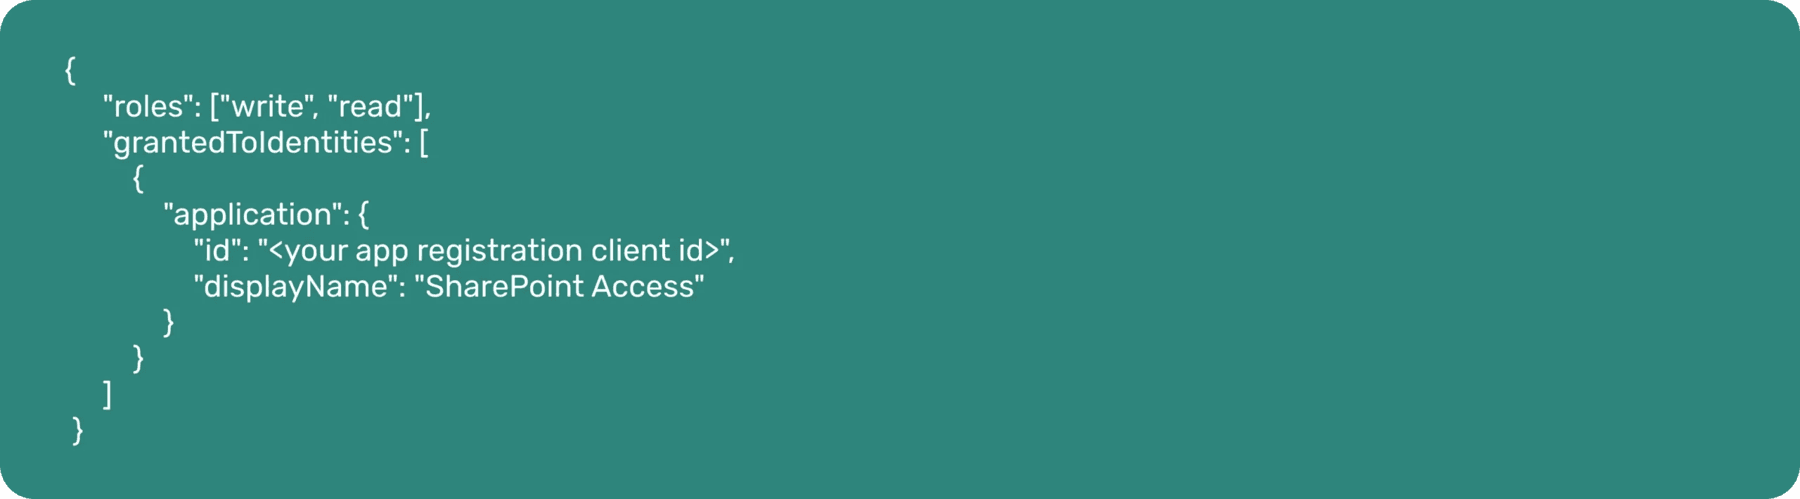
4. Then run POST on https://graph.microsoft.com/v1.0/sites/{site-id}/permissions with body:
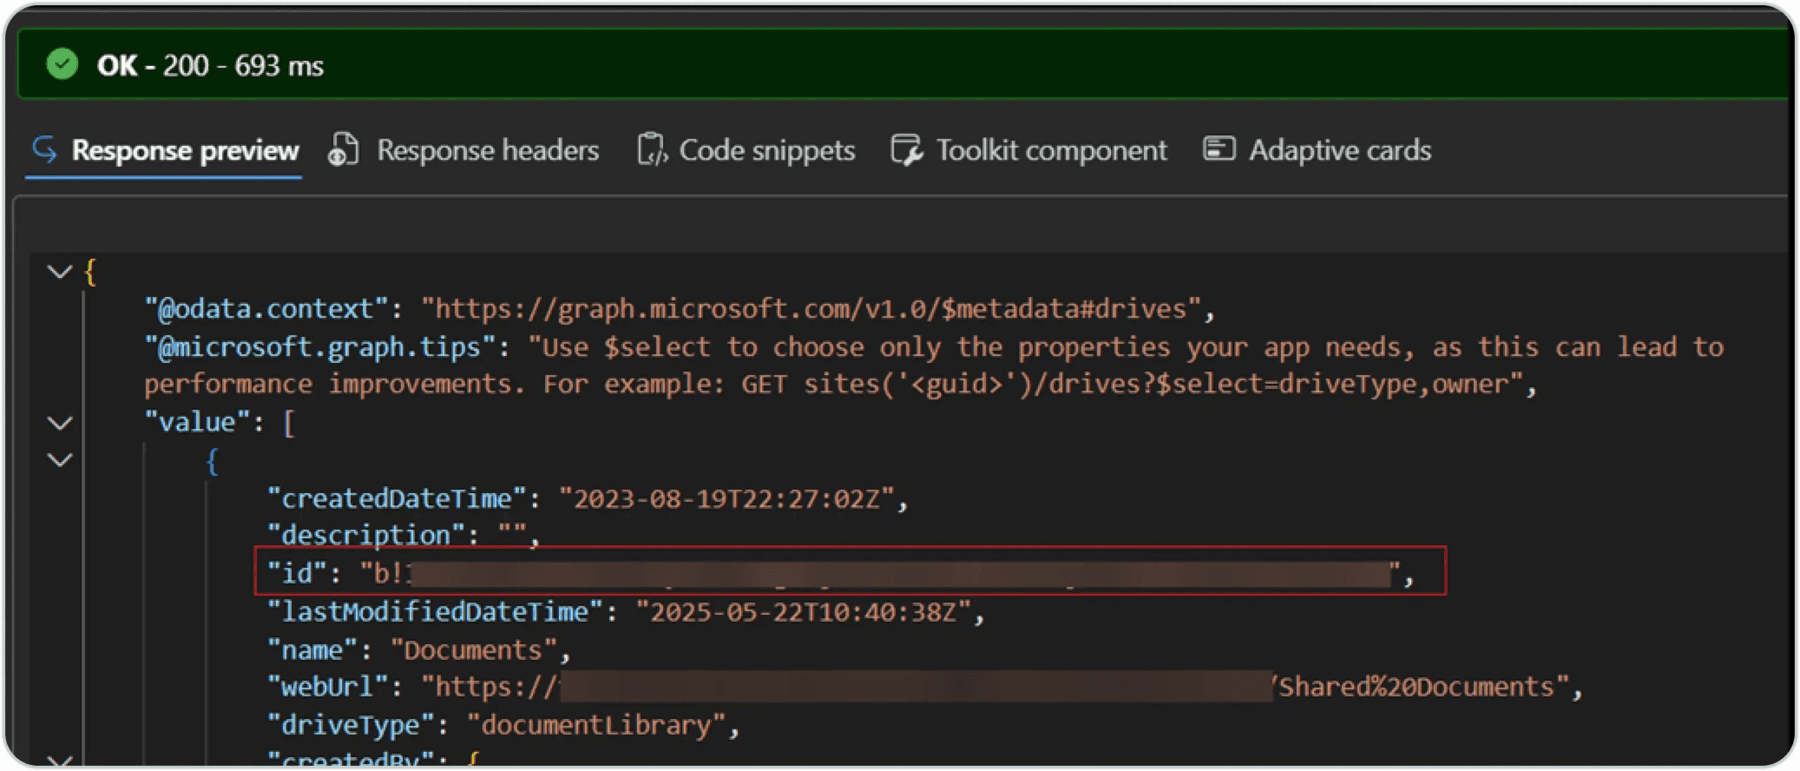
5. Navigate to your SharePoint site: Open your SharePoint site in your web browser. Find your SharePoint Site ID, you can follow these steps:

DocuVault Setup

SharePoint Usage: Specifies the value of the SharePoint Usage field.
Manual: All SharePoint integration is strictly manual.
Hybrid: The system will automatically upload to SharePoint when automated tasks upload to Document Attachments.
Override: The system will override the default behavior and only use SharePoint as the default storage location and hide the standard Document Attachment factboxes.
Hides Standard Attachments: Hides the standard BC Attachments factbox
Custom Base Folder: Overrides the default /Business Central/EnvironmentName and per company base path
Subfolder Per Company: When using default path, creates a subfolder that includes the Company Name
Site ID: Populate with id retrieved in section 2.1
Drive ID: Populate with id retrieved in section 2.2
Client ID: App id for the registration done in section 2.1
OAuth2.0 Client Secret: The client secret for the registration done in section 2.1

Base- and Subfolders
In DocuVault, there is a base folder in which all your documents are organised. You then have subfolders per environment, company and type of entity.
Base folder and subfolder fields are split to reduce the amount of manual setup required.
The base folder exists in the Shared Documents of the specified site.
The global default base folder is /Business central//
The global default base folder can be overridden by the Custom Base Folder field in the DocuVault Setup.
Further to this, the global default base folder can be overridden per folder mapping.
SharePoint Folder Mapping
If a document is uploaded for a table that is specified in the mapping setup, it will create a subfolder in the global base folder for that table using the table caption.
Subfolders are appended to the base folder.
Subfolders are created for each record using the primary key for that record. (Some special characters may have been removed).

SharePoint Folder Mappings List
Create a new entry for each table that you want to configure. Next, open the card page to edit the mapping conditions.


Upload Blocked: Prevents a user from uploading documents for that table.
Description: Non functional description intended for user to easily identify the correct record.
Custom Base Path: Overrides the global default and Custom Base Folder, still located within the same site’s Shared Documents folder.
Subfolder Name: Provide a custom folder name (can use a folder path) for a table. You can make use of placeholders. e.g. {2} will use the value in field 2 as the subfolder name. In the provided example, that would be the Project Task No. field value.

Append Table Name to Subfolder: Creates a subfolder in the parent folder with the Table Caption. Example: If we had folder mappings for Customer and Vendor tables, with Subfolder Name set to Finance for both, and Append Table Name to Subfolder set to Yes, it will create Finance\Customer and Finance\Vendor folders.
Split by Option Field: Creates subfolders per option value for the related record. Example: When using Document Type field for Sales Header or Purchase Header table, it will create Quote, Order, Invoice, Credit Memo and Blanket Order subfolders.
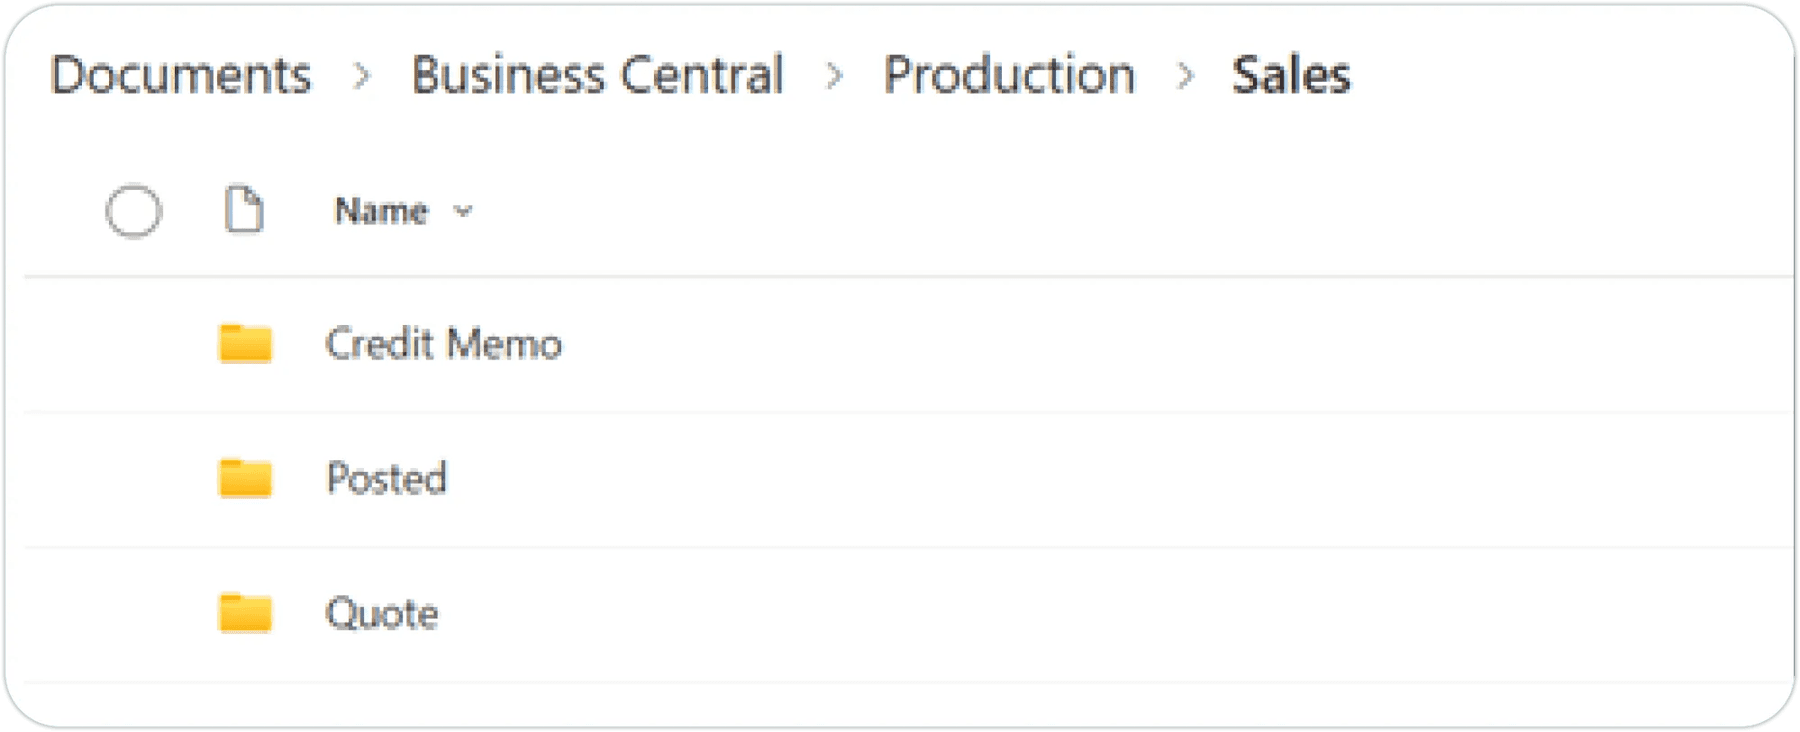
Split Complex Keys As Folders: For each field in the primary key, it will create a subfolder. Example: Project Task record, Project No.=J001, Project Task No.=T0123, it will create a /J001/T0123 folder, instead of the J001-T0123 folder.
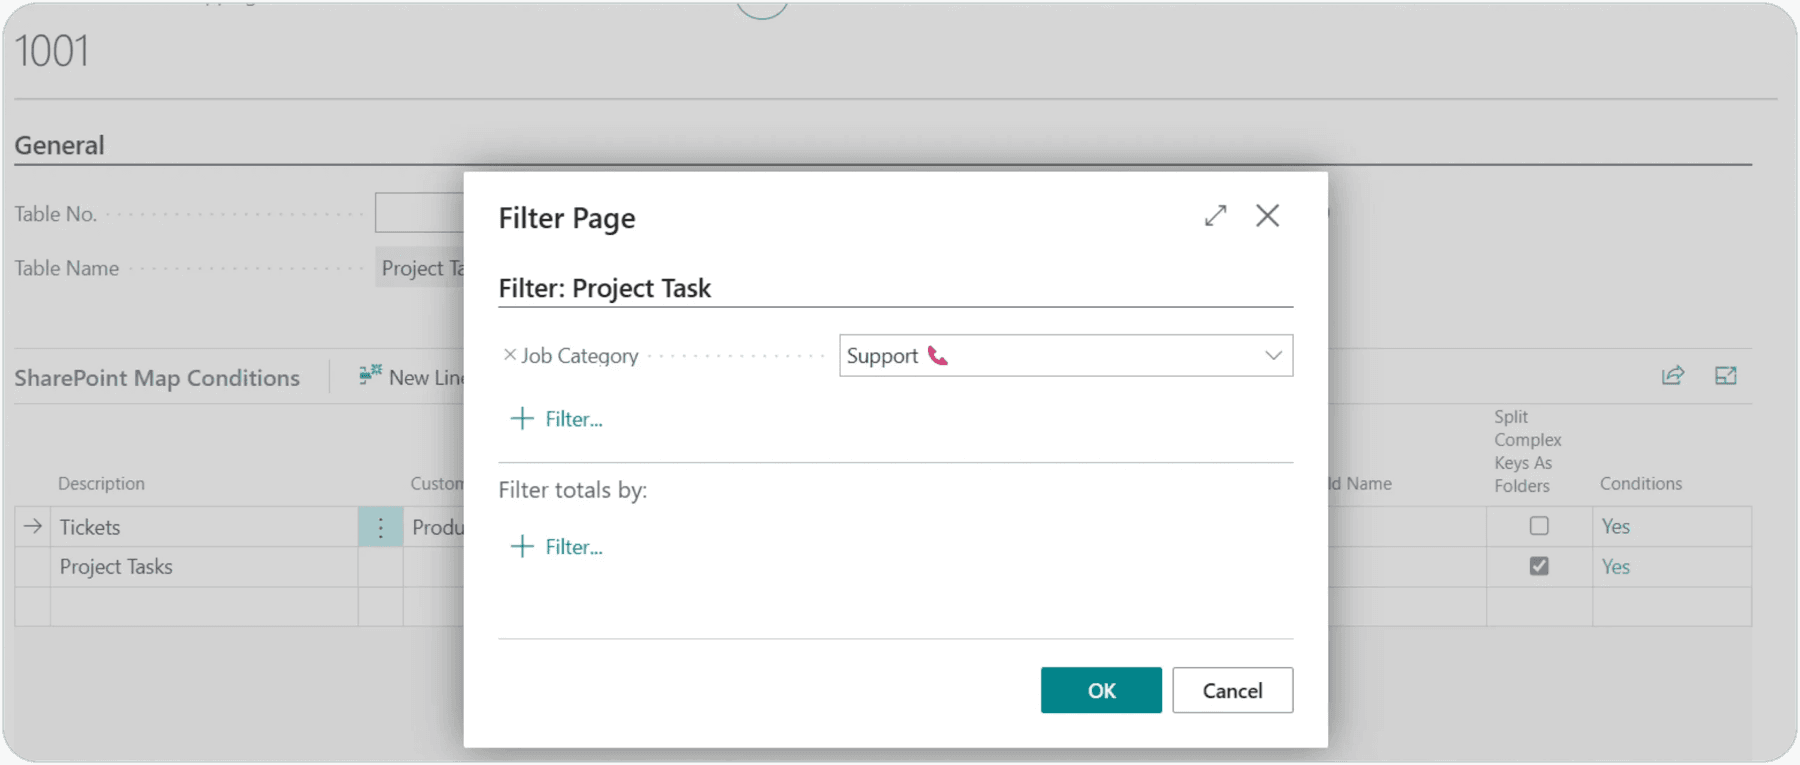
Conditions: Allows you to specify the conditions when it must use the current mapping configuration.
In the example, we store attachments for our tickets in a /Production/T0123/ folder. A ticket is a Project Task, and we differentiate it with a custom field, Job Category.
Regular project tasks, the condition filters on everything other than Support Job Category and they will be located, for example, in /Business Central/Production/Project/J001/T0123

For Sales and Purchases, a document linked to a quote will follow the record through its lifecycle all the way to a posted document. It will also carry that link on to archived versions of the document. However, keep in mind that the links will refer to the folder where the link was created. It does not move the files; it copies the links to the existing file. E.g. If you create a quote and upload files, then convert to an order and upload files and then post and upload files, you will have documents linked on your posted invoice that reside in the original quote, order and posted invoice folders.
Need help with your environment?
Use your agreed Braintree support channel, or contact the team to confirm the right support route.
Contact Braintree
